As part of TPP, we were asked to deliver a 20 minutes microteaching session for a group of 6 people using an object-based learning approach.
1. Session Plan & Timing
1. Timing
9 minutes >>> Slidedeck (14 slides)
3 minutes >>> Briefing & Demo
7 minutes >>> Activity
1 minute >>> Sharing & conclusions
2. Materials
- Gelli blocks
- Water soluble ink
- Roller
- Glass square
- Newsprint
- Diverse objects, fabrics, packaging, organic matter…
3. LEARNING OUTCOMES:
- Create 2 Gelli mono prints per student
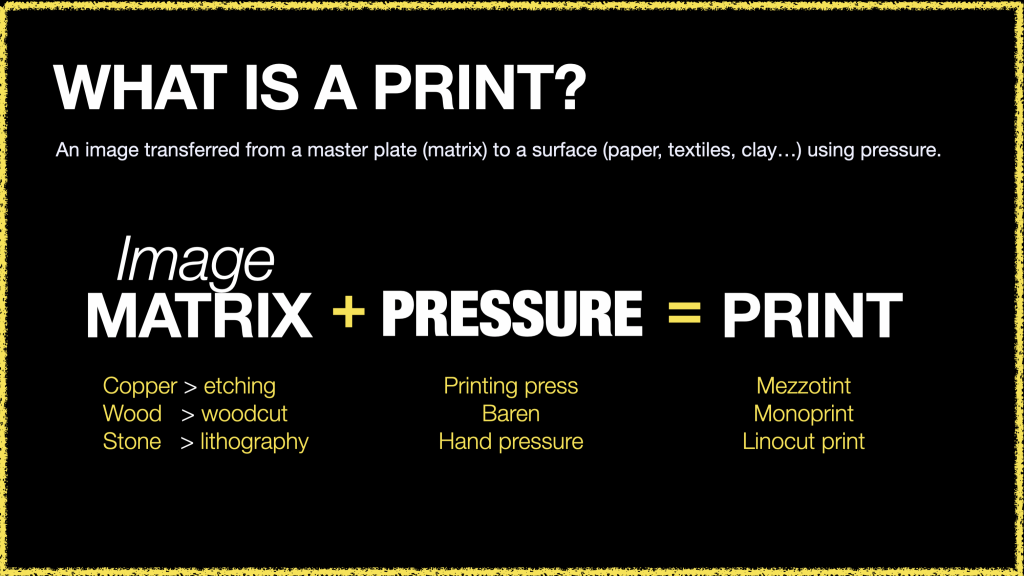
- Discern the intrinsic characteristics of print
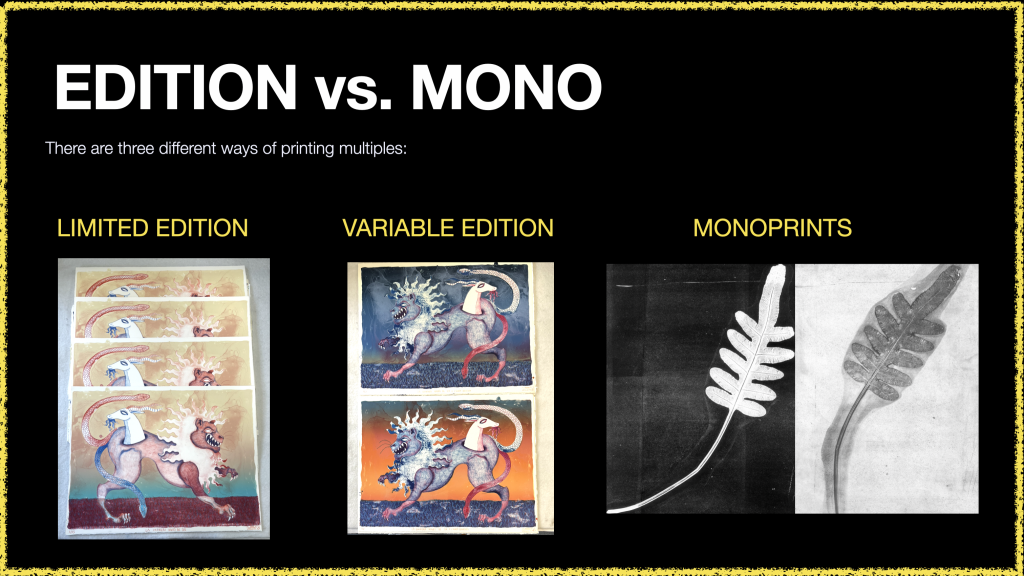
- Recognise the difference between monoprint and limited edition prints
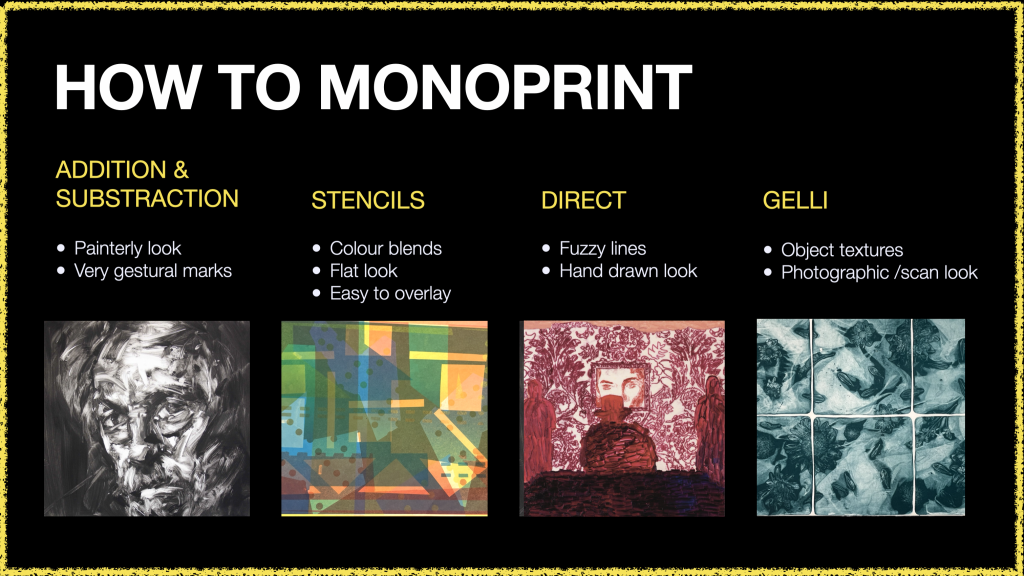
- Differentiate between different types of monoprinting methods
2. Key Decisions

SLIDE DECK PRESENTATION
Information needs to be presented in a very visual way using highlights, relevant titles and bullet point lists. Graphic design elements are used as aid for those who English isn’t their first language.
GRAPHICS FOR ABSTRACT TERMS
Teaching in the workshop, I know how abstract some terms and processes can sound to the unexperienced student, thus backing up all my explanations with images that exemplified my words is the only way to keep everyone engaged and following.
PRACTICE AS MEANS TO ASSIMILATE THEORY
I believe it convenient to give a contextual and theoretical background to the activity, for their attention becomes a bit more driven and focused when making than if they were just asked to come up with a bunch of prints.
SHARING RESULTS
Sharing results is not only related to learning from one another, but also to creating a sense of community. Listening to everyone’s conclusions is an interesting way to wrap up the session and get everyone back on the same page, after having worked independently.
3. Description of the session
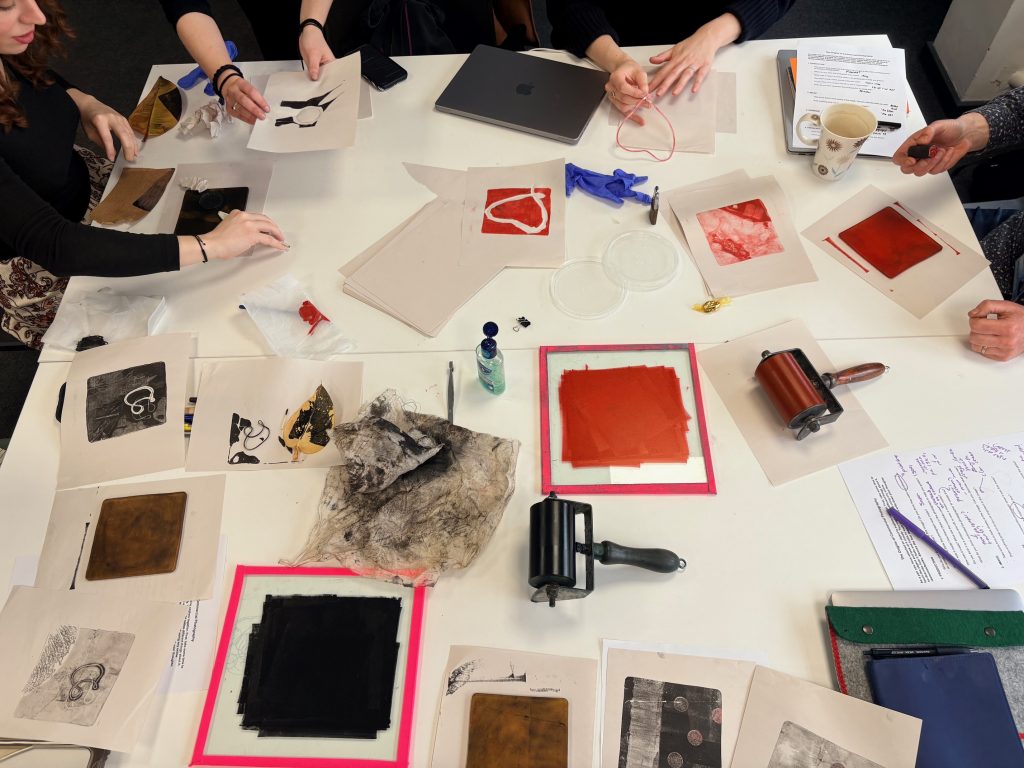
Prior to the start of the session, I handed out a gelli plate on a sheet of newsprint to every participant. I also laid out the ink on two glass squares using rollers. This way the participants could focus on working on their designs and compositions.
During the first half of the session, I introduced the theoretical aspects through a slide deck presentation projected on a big screen and packed with visual references to backup my explanations. I had visual examples of all the types of printing I talked about, and the text-based content was visually structured to highlight key terminology. I also showed a slide that introduced the materials we were going to use for the hands-on activity.
In the following 3 minutes, I demonstrated how to ink up a gelli plate, how to paste different objects, packaging, fabrics… on it, and how to peel a print off it using newsprint. I showed different alterations that can be printed using the same plate and the same elements without inking up again. Then I proposed they try;
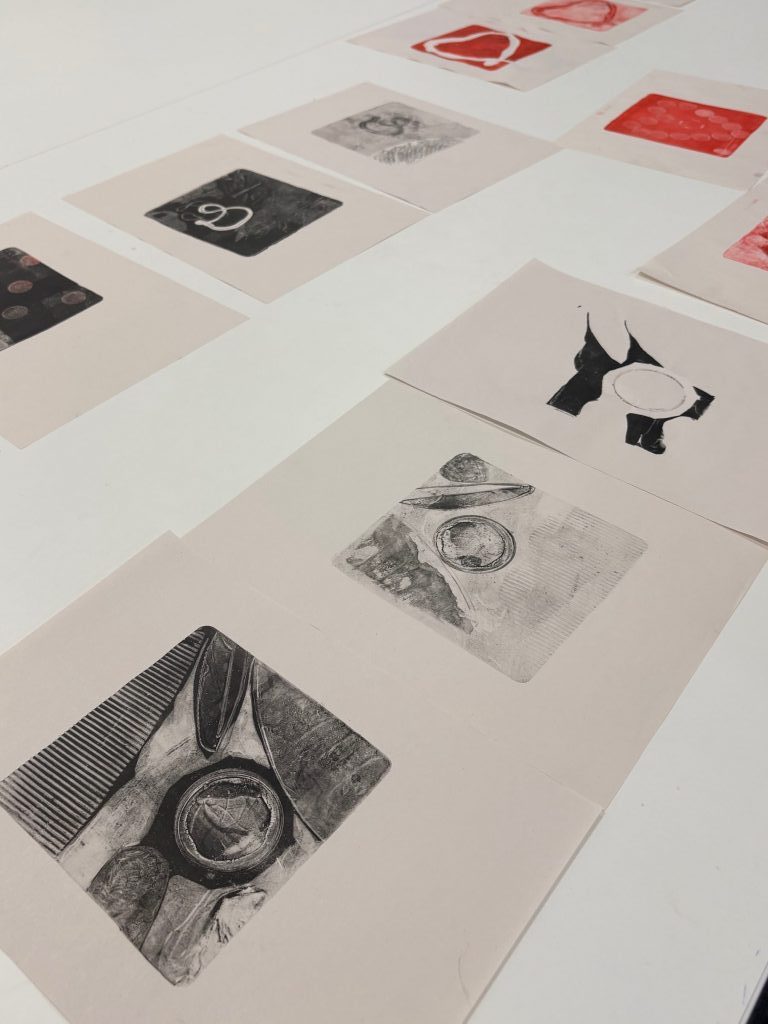
Participants had around 8 minutes to work on their own compositions. That includes, inking up the gelli plate, selecting and arranging their elements on the gelli, pressing a newsprint with their own hands on the gelli and peeling the print. They used a second sheet of newsprint to get a second monoprint out the same plate and elements. I supervised the activity and gave individual feedback and tips when appropriate. I also pointed at elements that had been previously described during the slide deck presentation, to reinforce that knowledge.
Participants carried on printing until the end of the session. We didn’t have time discuss the results in depth but managed to share them by taking a photo of all the prints together.
Feedback was given afterwards.
4. Feedback Summary
The feedback I received was quite unanimous, with all participants agreeing that the presentation was very clear and easy to follow. It was noted how I explained the topic from the very basics, not assuming they knew anything about it previously, this was seen as a good way not to leave anyone behind. Some of the slides specially stood out for their strong graphic design, making it visually compelling and easy to understand even by those who English isn’t their first language. (Note image Slide 3)
Pictures used as examples were also perceived as “really helpful” as they “reinforced” my words. Highlights in the presentation were also appreciated and seemed to summarise my explanations very well.
Participants enjoyed that it was an interactive session, since they expressed that regardless of how interested in the topic they might be, having to produce a physical outcome naturally triggers questions and gets you interested.
One participant also point out the potential for collaboration between students. I gave an example of a project which involves three students using one gelli plate.
It was suggested swapping the order of the session and doing the practical part first.
5. Reflecting on the Session
Some of the participants stated they were eager to start the activity as they saw the material laying on the table, however I didn’t refer to it during the presentation until the very end. Hence they didn’t interact with it, and payed attention to the presentation hoping I might give them a hint of what we were about to do. I am satisfied with the order in which I run the session.
Introducing the materials as part of the slide deck was a good way to bridge from the theory onto the practice, making everyone familiar with the objects on the table before my demonstration.
I was worried the demonstration went on for too long, but that is not how it was perceived.
By the end of the session, participants seemed keen to carry on printing, which for me sets the perfect mindset for the student to keep developing work in the future.
I had never realised the value of a “take-home souvenir” -term used by a participant to describe the gelli prints-. Physical outcomes that can be kept and collected are traces of learning, which positively impact students connection with their just-learnt knowledge. I would like to keep that in mind for future sessions.
I would have liked to have a bit more time at the end to discuss their results further as a group. In the future I will be more strict with time, and make sure they understand the time limitations even before we start making.
Leave a Reply